This guide is useful to train your own Google AutoML translation model. For example, you can train a domain MT model, such as medical, legal, video games, financial reporting with your translation memory accumulated over the years. Alternatively, you can make an organization-specific model that knows all the product and people names, and follows your individual styles.
Unlike brands like Globalese, ModernMT and Systran, training Google models is a technically complex task that requires some developer skills and knowledge. But with our guide a technically-savvy project manager or a solution architect on a language team can take on the ML operations.
- If you’ve used the Google Cloud Platform before, each part of the training will take: 10 to 15 minutes
- Creating a billing: 30+ minutes
- Training the model: 20+ minutes for the setup; 6+ hours for training
CREATING AN ACCOUNT
- Go to https://console.cloud.google.com/
- You need a Gmail account to use the Console, which contains many features, including Model Training.
TIP: Make sure to pick the correct Google account when entering the Console. The new tab will open after you switch accounts.

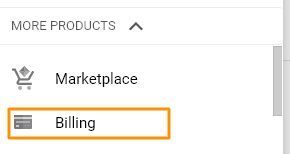
After entering the Console, you’ll see the main dashboard. Select “Billing” from the dropdown menu on the left.
What it is: GCP (Google Cloud Platform) is used internally to support products like Google Search and YouTube. It contains a suite of cloud computing resources. GCP’s wide range of services includes Infrastructure as a Service (IaaS), Platform as a Service (PaaS), and Software as a Service (SaaS) options.
CREATING A BILLING
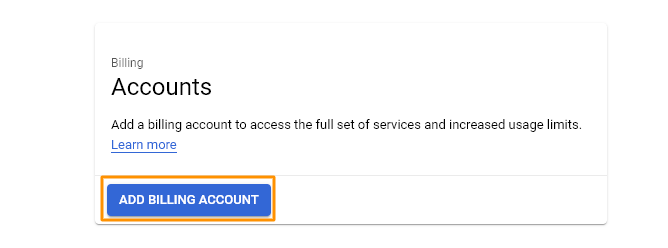
Click the button “Add Billing Account”.
TIP: Different pages will be shown once you have more than one billing account. You can manage the current account or choose another one.
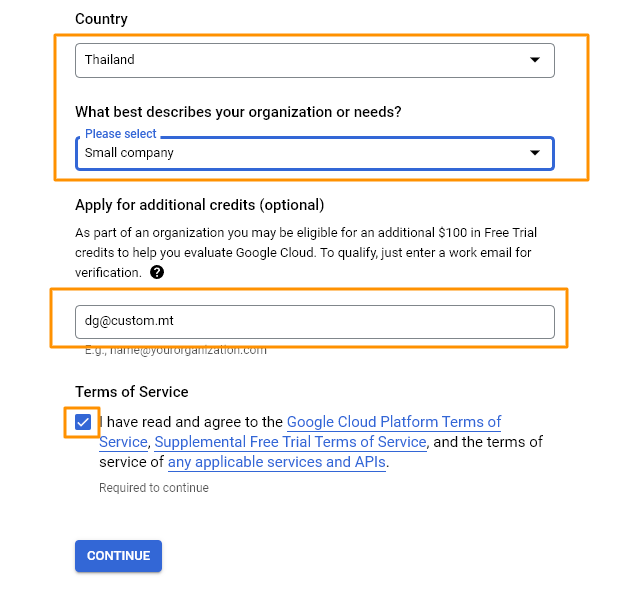
- Follow the instructions and provide all the needed details.
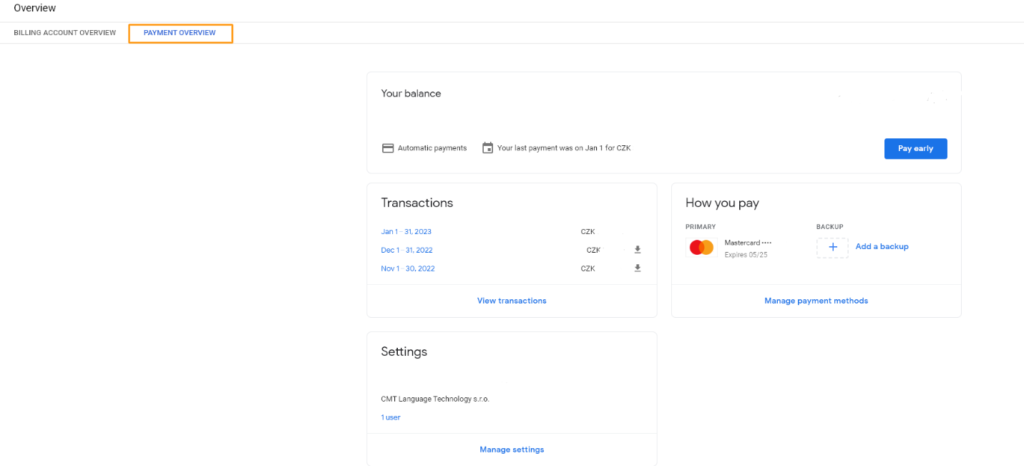
In the Billing section, you can find the Payment Overview tab. This shows all the main details of your account.
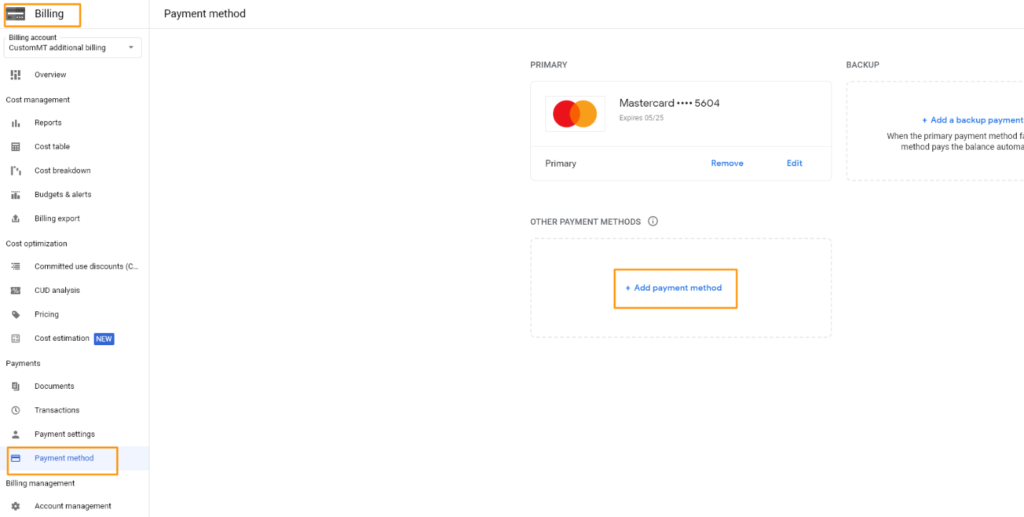
- Once you have an active billing account, go to Billing > Payment Method and add your card as a payment method.
TIP: You need to have a billing account to be able to create a project. Make sure you pick the correct billing account before adding the card. Put in all the legal information and approve your contacts if Google asks. Then, just follow Google instructions.
TIME: It can take up to one day to verify your credentials.
Now that you have an account with active billing, it’s time to begin your first project!
TRAINING THE MODEL
Set Up Your Project
- Go to https://console.cloud.google.com/
TIP: As always, double-check the Google account you’re using to enter the system.
2. Select “New Project”.

3. Provide all the needed information and click “Create”.
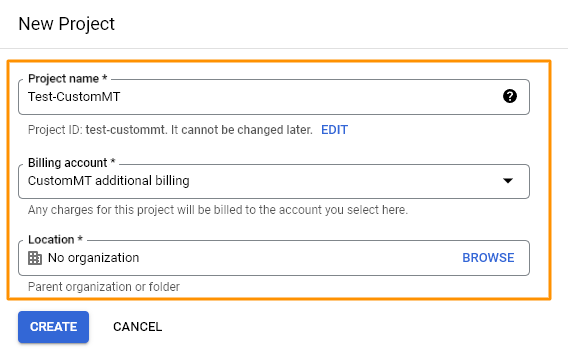
What is: To know more about the organizations, visit this link:
https://cloud.google.com/resource-manager/docs/creating-managing-organization
TIP: Create individual projects for every language pair you have. This is how you can avoid Google bugs – it currently doesn’t show detailed information by language!
4. Choose your project and find the “Translation” service through the search bar.

5. Click on “Enable API” and wait for a while.
What is it: Turn the API on. It will give you access to use models through CAT tools.
TIME: It usually takes around 3 to 5 minutes to turn on the API.
Execute Training
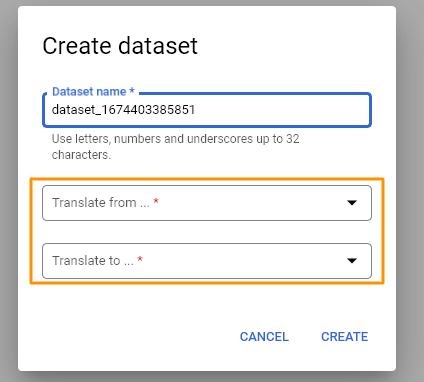
6. Go to Datasets and click “Create Dataset”.
What it is: The Translation section is the space where you can manage/store your data for training and models, plus see the detailed information.
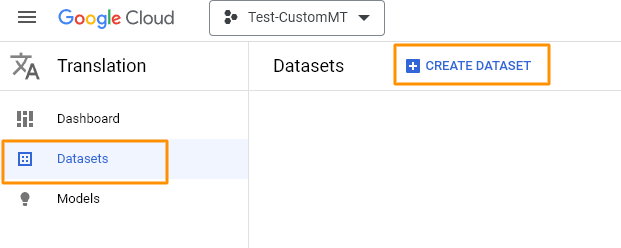
7. Choose the language pair you need.
TIP: Name the dataset that mentions the language pair to make orientation easier.
It’s essential to check the language pair before training starts. There won’t be a way back!
8. Click on “Browse” to start creating a bucket.
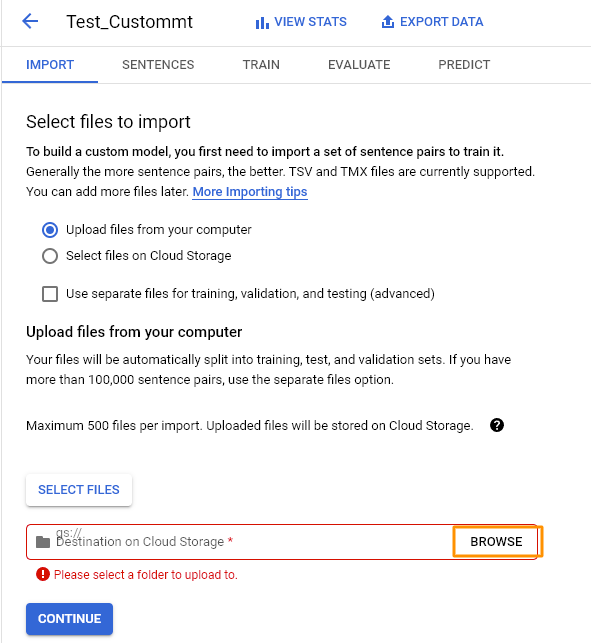
9. Click on the icon to create a new bucket.
What it is: The “Bucket” is the space that will store all your files, Including files for trainings and glossaries.

10. Name the bucket and choose the Region (Important).
TIP: Choose the region carefully. Otherwise, you may need to recreate the project. As a best practice, use a single region, as shown in the screenshot.
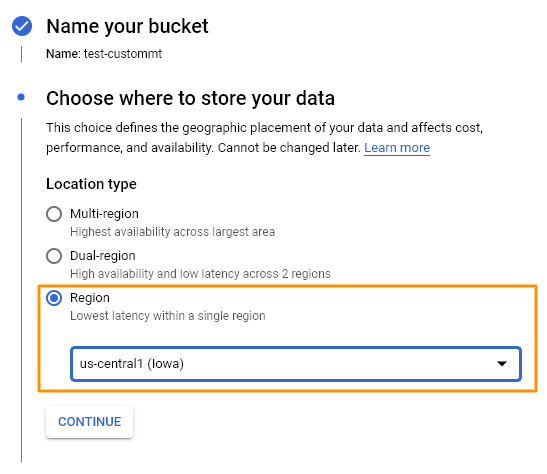
11. Leave the rest of the options unchanged.
12. Choose the new bucket and click the “Select” button.

13. Next, choose to upload the file and click “Select Files”.
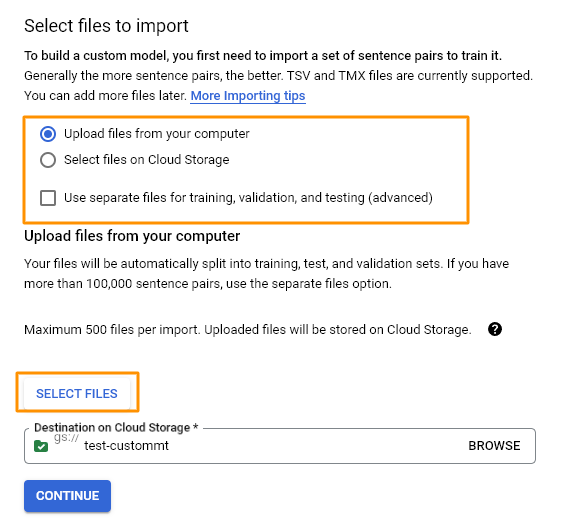
TIP: Use “Upload files from your computer”. This does not lead to issues and bugs. The usual file format for training is TMX (Translation Memory eXchange). Basic information can be found here: https://cloud.google.com/translate/automl/docs/prepare#translation_memory_exchange_tmx
TIP: Some providers have a limit of 100 MB per file. You can easily separate large datasets into small, single applications–for example, the Heartsome app.
14.Choose the file and click “Continue”.
15. Wait until “processing sentence pairs” is complete.
TIME: Approximately 10 to 15 minutes, depending on the size of the dataset.
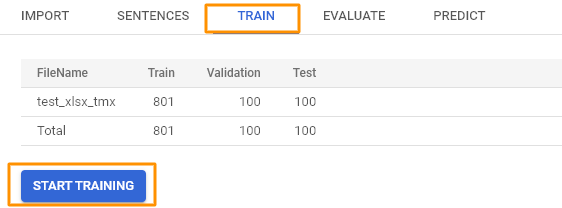
16. Go to the “Train” section and click “Start Training”.
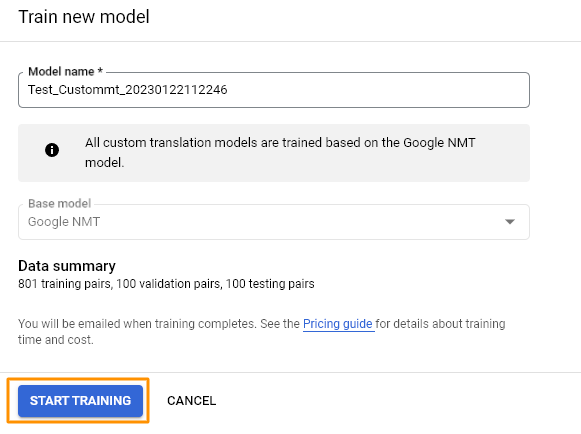
17. Check everything and click “Start training” again.
TIP: Make sure all details are correct before starting the training. Check the language pair, billing, etc. Training that has commenced cannot be refunded.
HOW TO USE CREDENTIALS
- In case you need to use credentials to translate by CAT tools: most ask for the Project ID, Model ID, and json file (service account key).
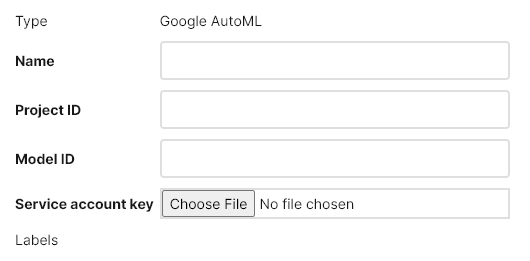
2. The Project ID can be found in the project section, where you can create or choose projects.

3. The Model ID can be found in the Translation section. The ID will appear below the name of the model itself.

4. To create the json file, go to IAM & Admin > Service Accounts.
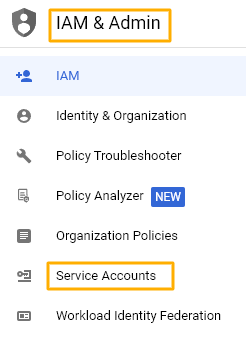
5. Go to the service account that has been created automatically.
TIP: You can add as many service accounts as you need for a variety of uses.
6. Go to the KEYS tab.

7. Click “ADD KEY” and create a new key.
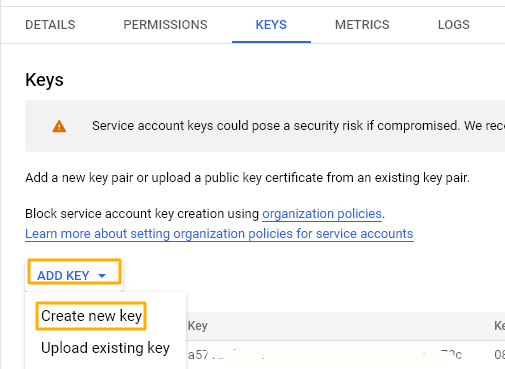
8. You’ll have two options to choose from: JSON and P12.
What it is: P12 is an alternate extension for what is generally referred to as a “PFX file”. It’s the combined format that holds the private key and certificate. It’s also the format that most modern signing utilities use.
9. Choose the JSON file to download it to your PC. Keep it for use.

Comments are closed.